I am the first to admit that I have a problem – whenever I see Falooda on a menu, or cart, I must have it! While I know some don’t like it, I absolutely adore the silky and creamy feel of it. Also, it doesn’t hurt that if someone else doesn’t want to share, that’s more for me.
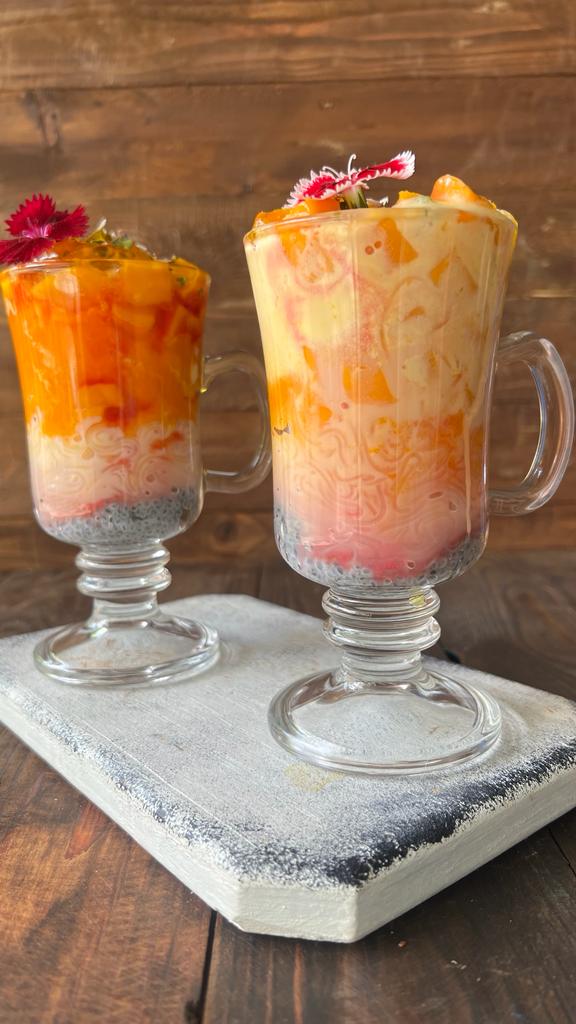
This Mango Falooda recipe takes textural complexity to a different level. With layers of falooda, luscious mango, velvety ice cream, topped with a perfect crunch of nuts, it’s the perfect quick, yet indulgent, dessert for those long summer days.
| Servings | 2 glass (tall) |
| Course | Dessert |
| Preparation Time | 10 minutes |
| Cook Time | Nil |
Ingredients for Mango Falooda Ice cream(1 cup=200 ml, 1 tbsp=15 ml) |
|
| 2 tbsp | Soaked subja seeds (basil seeds) |
| 2 tbsp | Falooda sev (cook as per packet instructions) |
| 4 tbsp | Rose syrup |
| 6 tbsp | Fresh alphonso mango pulp |
| 6 – 8 tbsp | Fresh alphonso mango diced |
| 2 scoops | Mango ice cream |
| ½ cup | Chilled milk |
| 4 – 6 tbsp | Mango jelly |
| 1 – 2 tbsp | Pistachios for garnish |
| 1 – 2 tbsp | Almond slivers for garnish |
Instructions for the Mango Falooda Ice cream |
|
| 1. | In both the glasses add the following ingredients equally
a) Subza seeds b) Falooda Sev c) Mango pulp d) Chilled milk e) Chopped mango pieces f) Mango ice cream g) Rose syrup h) Mango chopped once again i) Mango jelly j) Pistachio and almond slivers |
| 2. | Dig in immediately. Serve chilled. |